Additional configurations
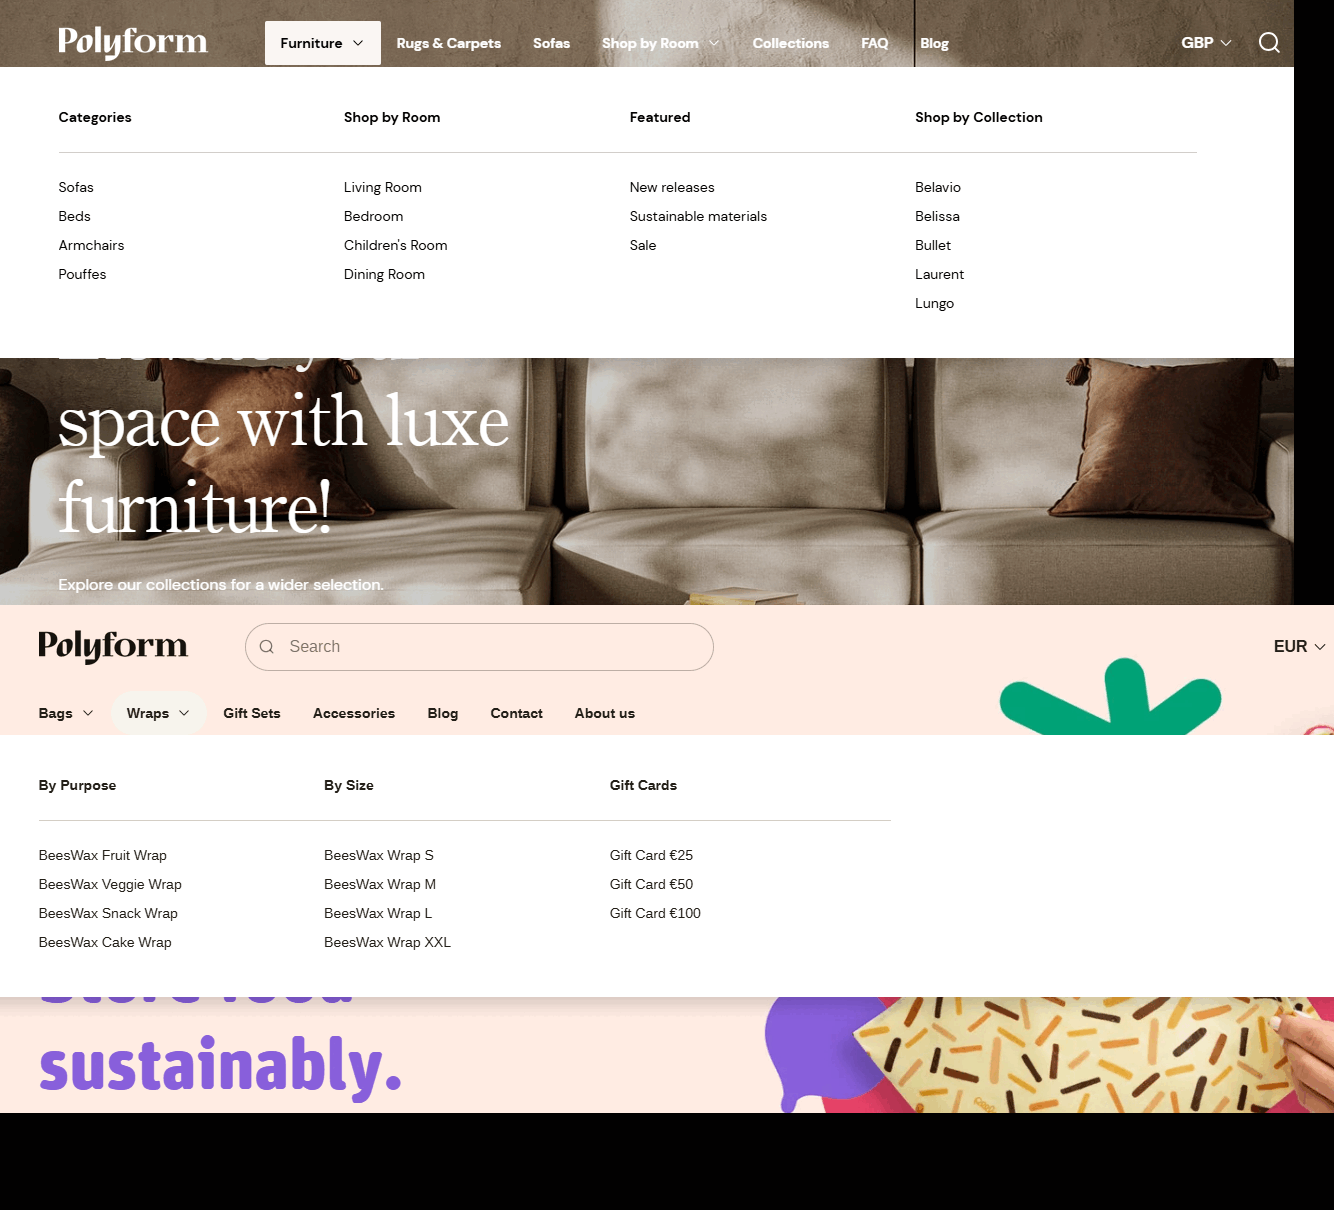
Mega menu
How to Create a Megamenu

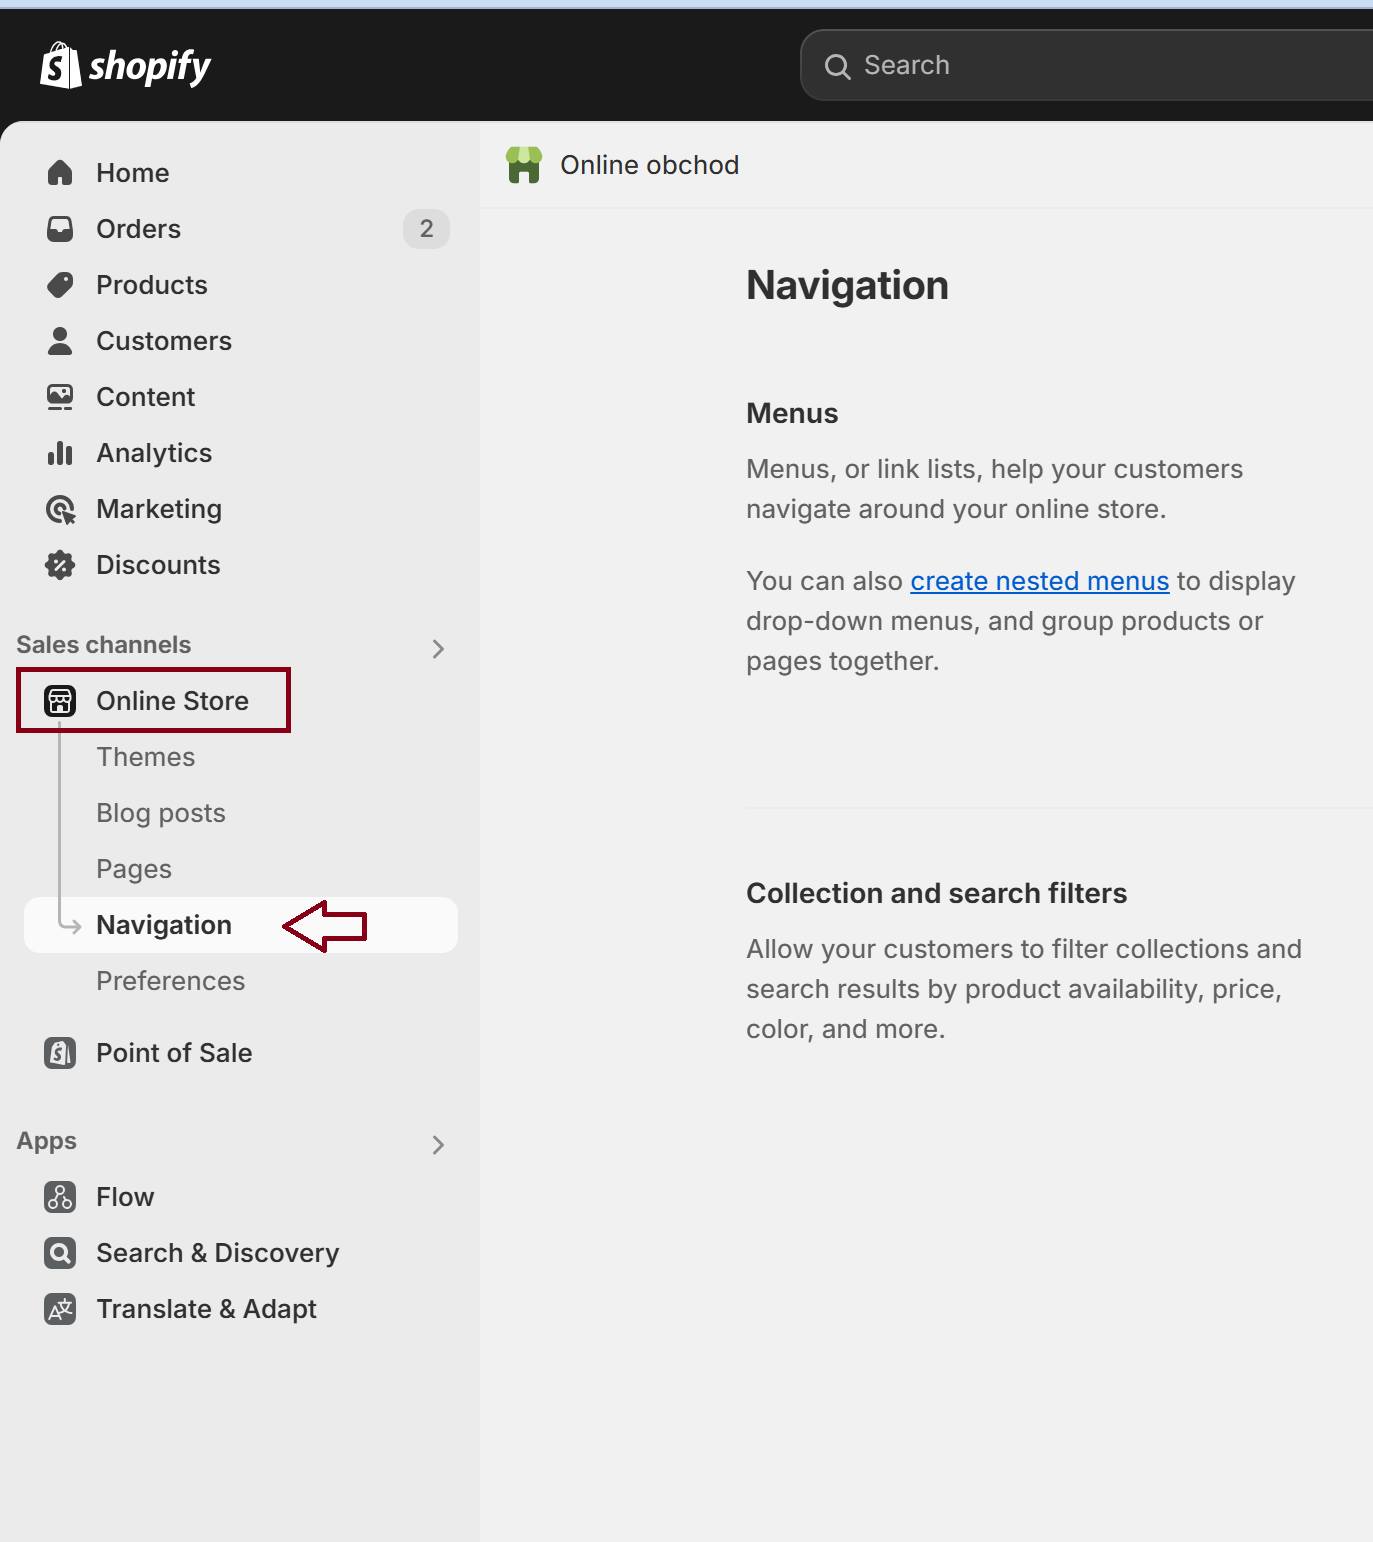
1. Go to Navigation
- In the Shopify admin, go to Online Store > Navigation.

2. Choose or Create a Main Menu
- Select your Main Menu or create a new menu if needed.

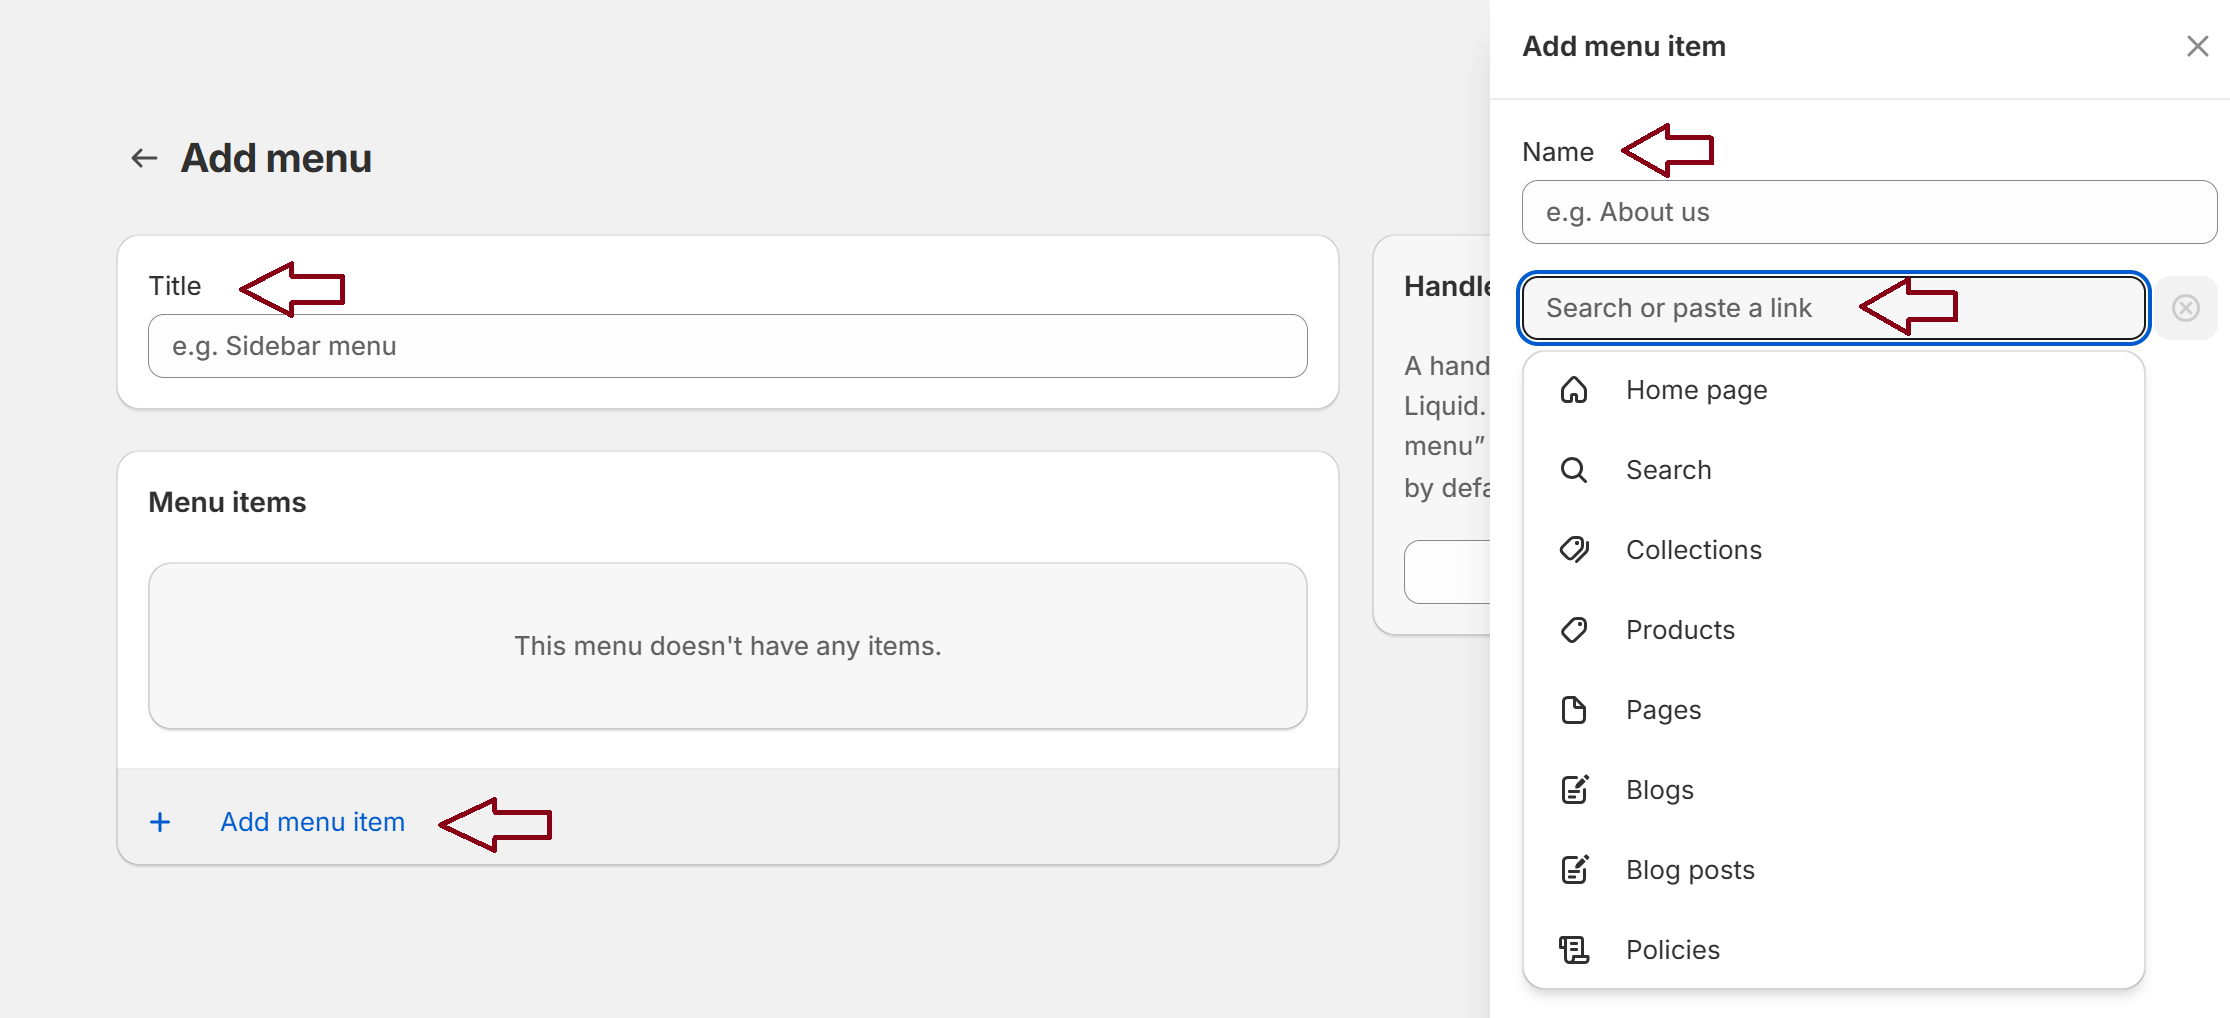
3. Add a Top-Level Menu Item
- Click Add menu item and enter a name for the main category (e.g., "Shop").
- Link it to the relevant page or collection, or leave it as a non-clickable header.

4. Add Sub-Menu Items
- Under the main menu item, add sub-menu items by clicking Add menu item again. These can be links to collections, products, or pages.
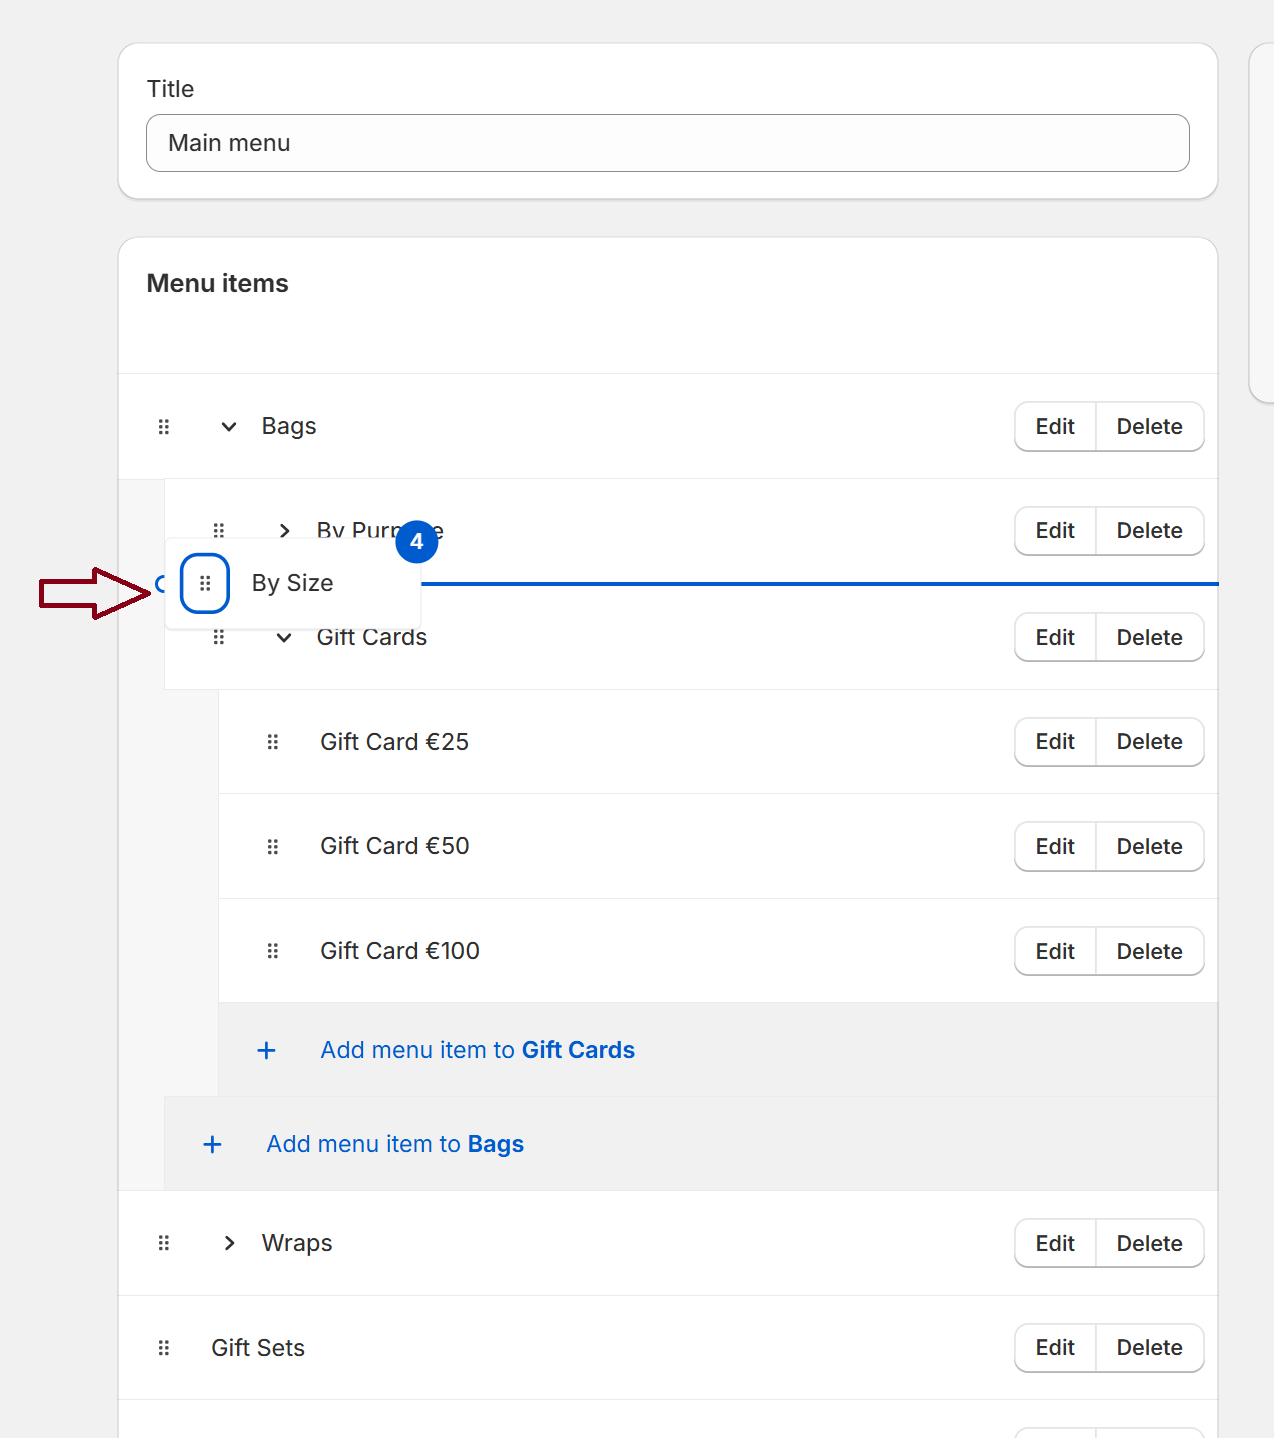
- Drag each item under the main category to create a hierarchy.

Tip
Shopify supports a maximum of 3 levels for mega menu items, so keep your structure within this limit.
5. Organize for Mega Menu
- Repeat this step to create multiple levels of sub-menu items, if needed, to achieve the mega menu structure.
- Ensure each sub-level is nested properly to appear as a drop-down.
6. Save the Menu
- Once you’re happy with the structure, click Save.
7. Customize in the Theme Editor
- Go to Online Store > Themes > Customize.
- Navigate to your header settings and adjust as necessary.
8. Preview and Publish
- Preview the changes to make sure the mega menu displays correctly, then publish the menu.