Additional configurations
Main menu
How to Create a Menu Bar

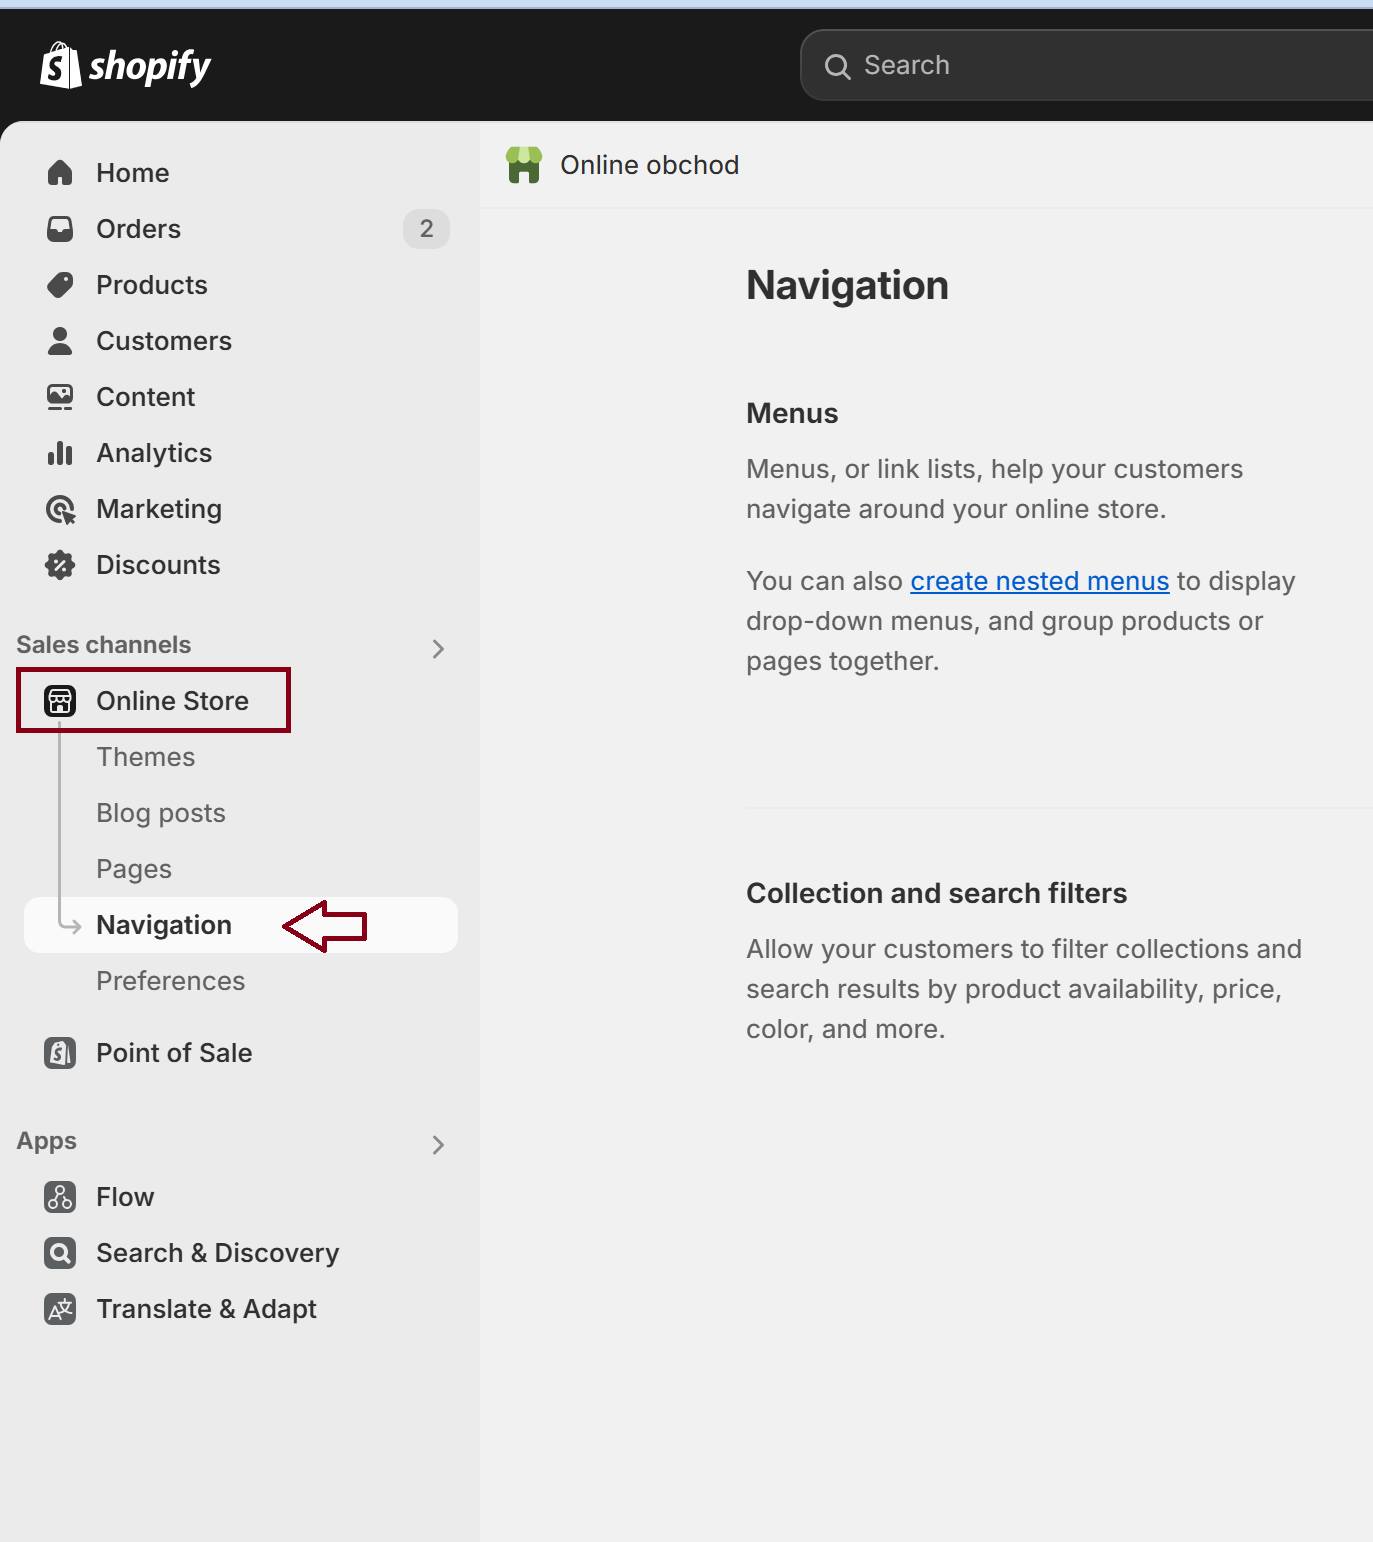
1. Access the Navigation Settings
- Log in to your Shopify admin.
- Go to Online Store > Navigation.

2. Choose or Create a Menu
- In the Navigation section, you'll see existing menus, such as the Main menu and Footer menu.
- To edit an existing menu (e.g., Main menu), click on it.
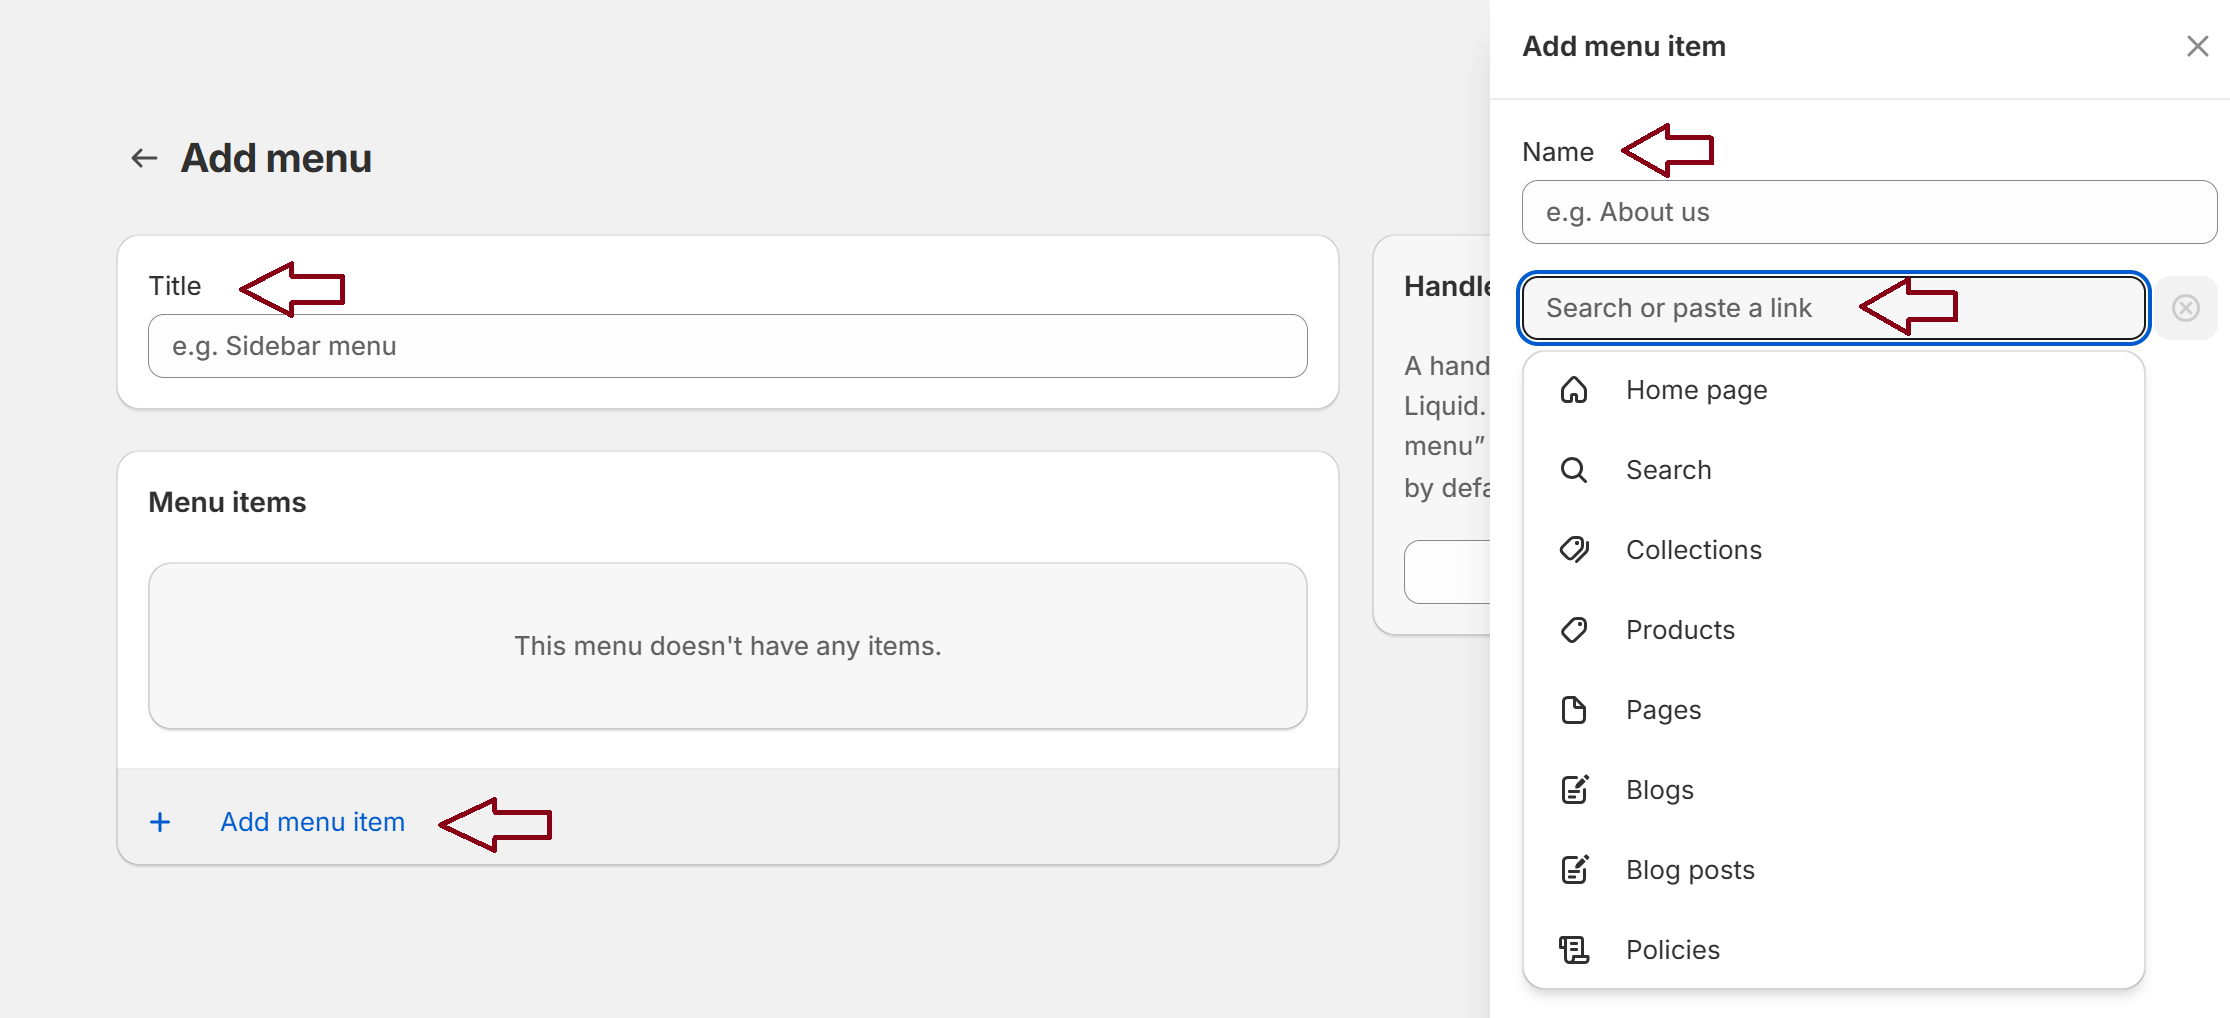
- To create a new menu, click Add menu, enter a name (like "Top Bar"), and click Save menu.

3. Add Menu Items
- Inside the selected menu, click Add menu item to add links to pages, products, collections, or external URLs.
- In the Name field, enter the label you want to display for this menu item (e.g., "Shop," "About Us").
- Use the Link field to specify the destination, choosing from options like collections, products, or custom URLs.
- Click Add to save each menu item.

4. Megamenu - Arrange Menu Items
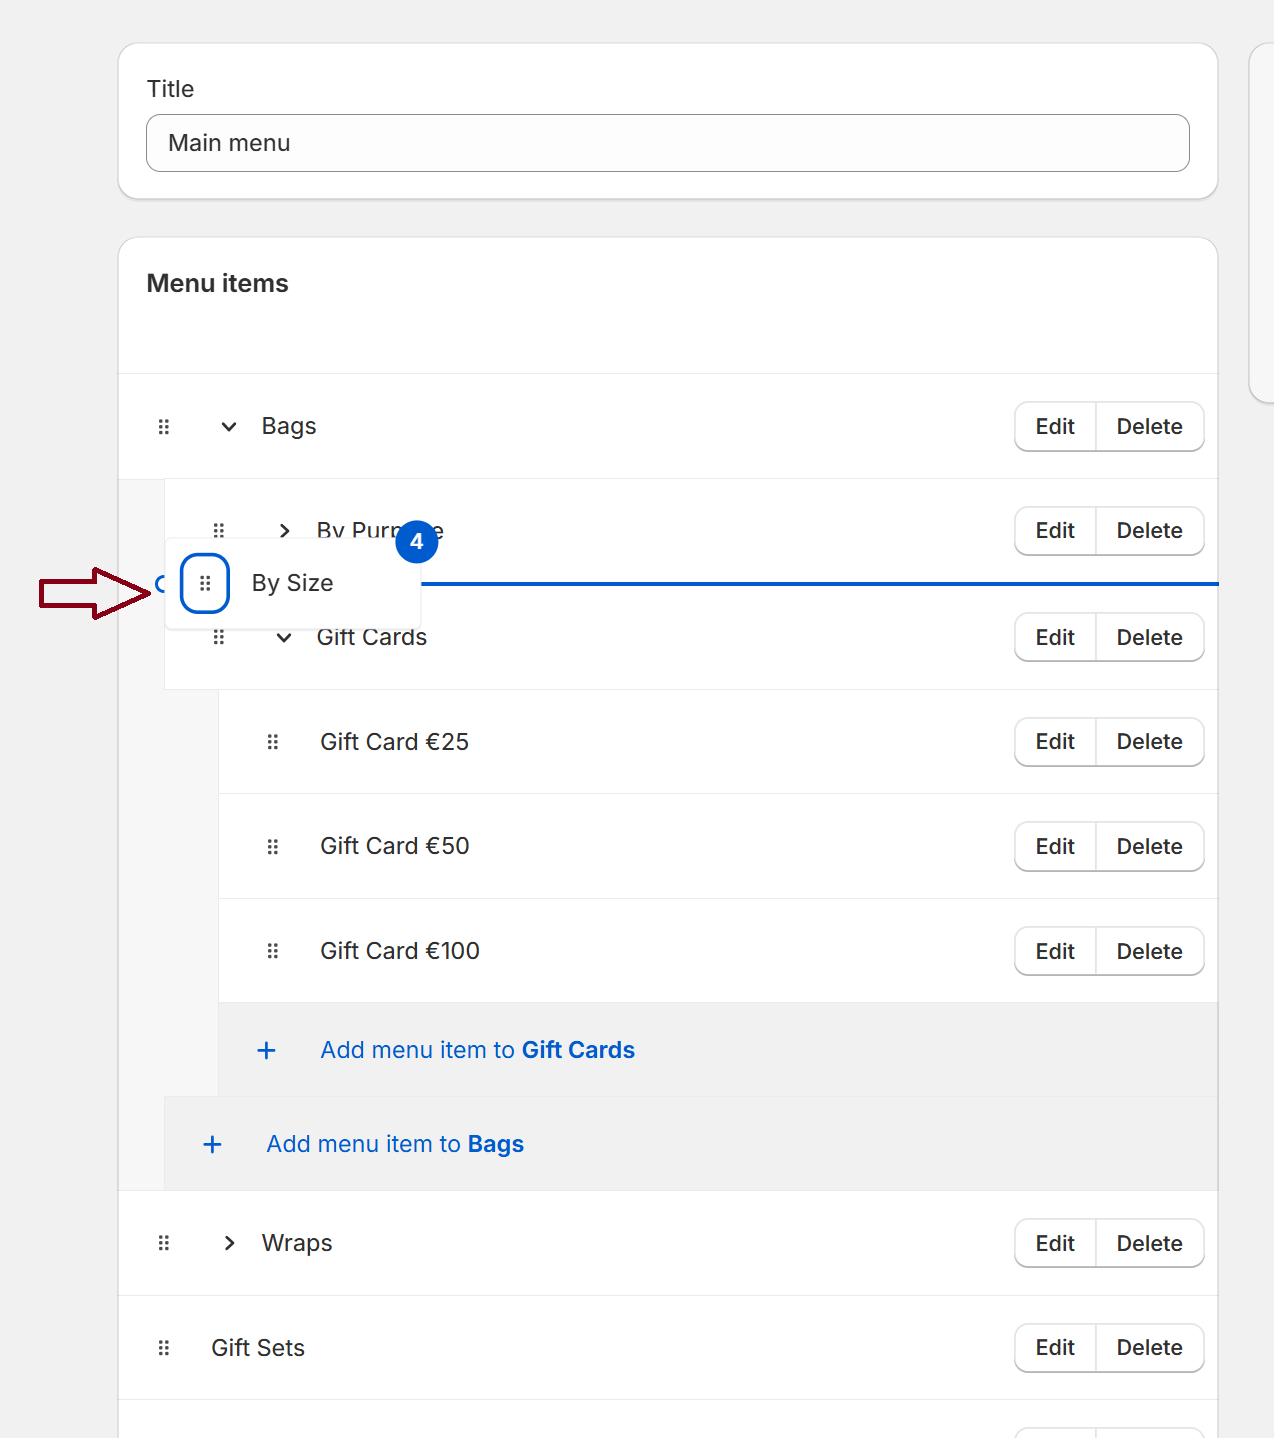
- Drag and drop menu items to reorder them as desired.
- To create dropdown menus, drag a menu item below and slightly to the right of a main item to make it a sub-item.

5. Save the Menu
- Once you've added and arranged all items, click Save menu.
6. Display the Menu in Your Theme
- Go to Online Store > Themes and click Customize for your active theme.
- In the theme editor, locate the Header section, and select the menu you created or modified to display as your menu bar.
- Save the changes in the theme editor.
Tip
Preview your store to check the menu bar's layout and functionality.